HTB — Writeup Walkthrough
Hi everyone! In this article, I will present the solution of Hackthebox machine namely as Writeup .
Enjoy reading!
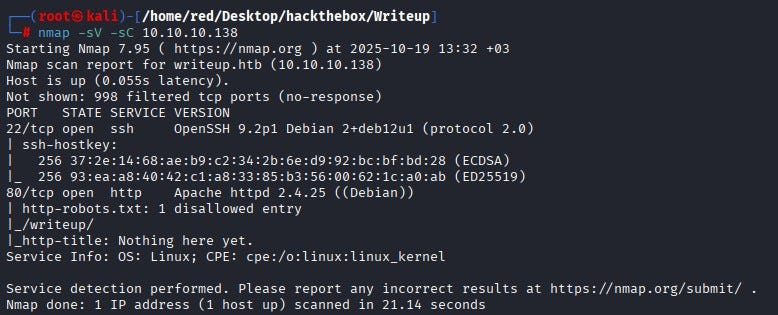
We start with an Nmap scan. According to the Nmap results, ports 22 and 80 are open. We cannot access SSH on port 22 at this time because we do not possess any credentials. Port 80 hosts an HTTP service. The banner indicates an Apache web server is running on port 80 and the scan shows a robots.txt entry listing a disallowed directory called /writeup/.
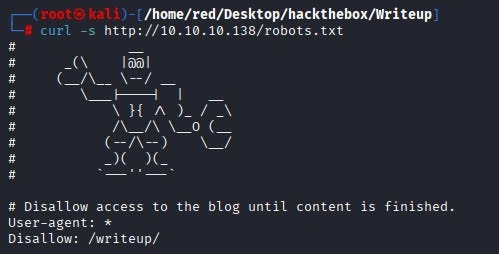
(_robots.txt_ is a plain-text file that web servers expose to tell well-behaved web crawlers which paths they should not index. It is not an access-control mechanism — rather, it’s a hint that often contains developer-hidden or low-visibility endpoints such as admin pages, backups or staging directories. In a security assessment, _robots.txt_ is useful because it frequently points to high-priority locations to investigate.)
When we examine the site itself, we observe it is protected by a DDoS/anti-abuse mechanism that bans IPs producing many 40x responses. Because 40x requests are blocked, noisy directory discovery tools such as gobuster produce many 404s and quickly result in our IP being banned, so aggressive brute-force scanning is not an effective option here.

We fetched robots.txt with curl from the terminal and confirmed it contains a Disallow: /writeup/ entry.
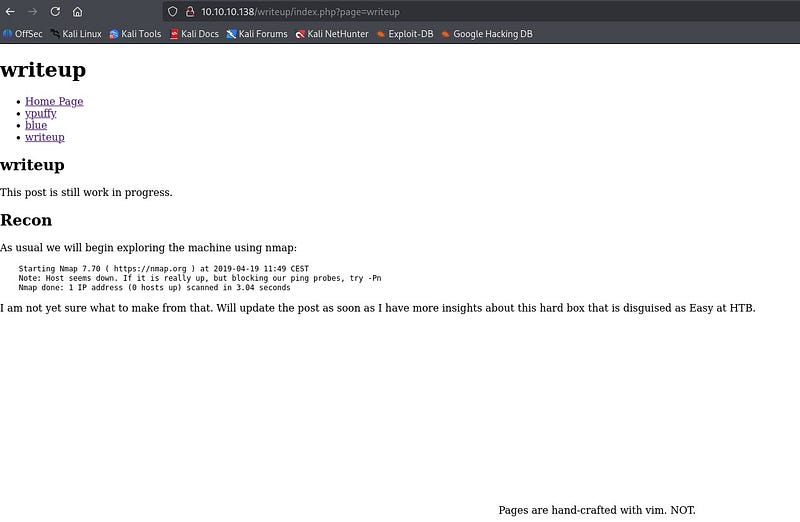
When we browse the /writeup/ directory we see a draft-style page; the page layout and visible content do not immediately reveal anything useful.
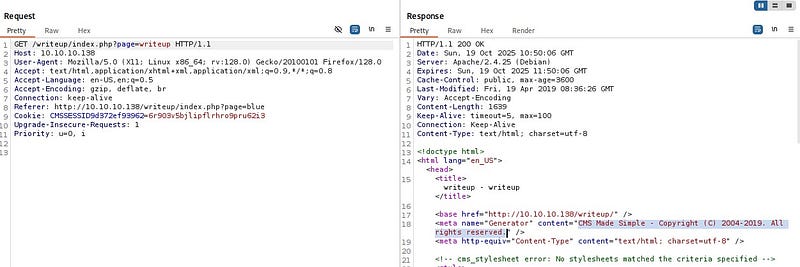
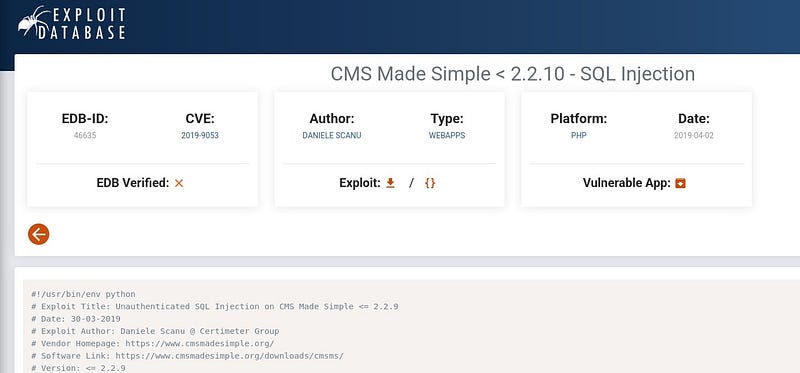
By proxying requests through Burp Suite and inspecting requests and responses, we find that the site is running a CMS. The CMS appears to be the 2019 release of that product, a version known to have SQL injection issues.
After a little research, we confirmed the 2019 version is vulnerable to an unauthenticated SQL injection and found an exploit published on Exploit-DB that targets that vulnerability.
The exploit is written for Python 2, so we install Python 2 on our attacking machine (or adapt the exploit to Python 3), provide the target URL and run the exploit.

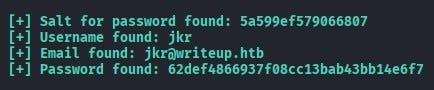
The exploit returns database fields including username, email, the password hash and the salt used for the password. Because the password is stored as a hash we must crack it before we can log in; for that we use Hashcat.
Examining the exploit code shows it constructs the hash as salt + password before hashing.

According to Hashcat’s documentation, hash mode 20 corresponds to md5($salt.$pass). Since the exploit performs salt + password, we use Hashcat mode 20.

We run Hashcat with rockyou.txt as a wordlist to recover the plaintext password.

Hashcat successfully recovers the password.

Using the recovered username and password we SSH into the box. After logging in as jkr we find the user flag in the jkr user’s home directory.

Privilege Escalation
To escalate privileges we first check for sudo but discover that sudo is not available on the system. Inspecting the output of id for the current user shows membership in an interesting group: staff.

On Debian-like systems, the staff group commonly allows members to add files under /usr/local — for example /usr/local/bin and /usr/local/sbin — without needing root privileges. Those two directories are typically placed near the front of the root user’s PATH. That means if root executes a command that resolves to a binary name that we can place in /usr/local/bin or /usr/local/sbin, we can overwrite or shadow the expected system binary with a malicious program and have that malicious code executed with root privileges.

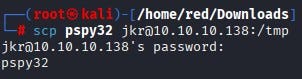
To observe what the system (including root) runs during user logins, we download pspy32 from GitHub and copy it to the target via scp, then make it executable.
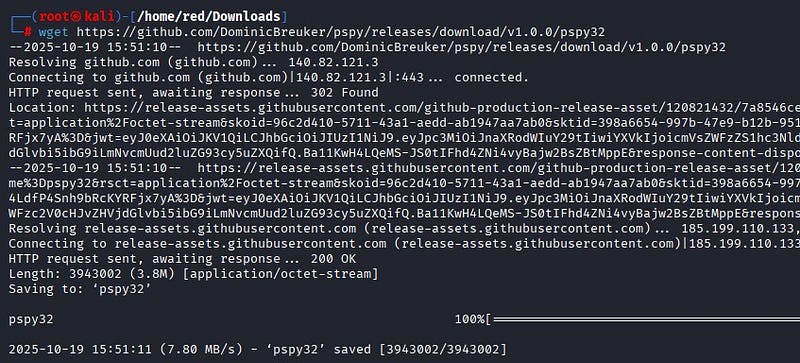

pspy is a lightweight monitoring binary that prints executed commands and process events in real time without requiring root; it is ideal for detecting cron jobs, system timers and other commands that run as root. Running pspy while initiating a new SSH session, we observe that during SSH login root invokes:
/usr/bin/env -i PATH=/usr/local/sbin:/usr/local/bin:… run-parts — lsbsysinit /etc/update-motd.d > /run/motd.dynamic.new

In other words, a clean environment is created (env -i) and the PATH is explicitly set with /usr/local/sbin and /usr/local/bin at the front and then run-parts executes the scripts in /etc/update-motd.d as root. Because /usr/local/sbin and /usr/local/bin are both writable by members of staff and because those directories appear at the beginning of the PATH that root uses when running run-parts, any binary name resolved by the MOTD scripts (for example uname or other common utilities invoked by those scripts) will resolve first to our writable /usr/local/bin if we place a program with the same name there. That precedence—root searching writable directories we control before secure system directories—creates a path-hijacking vector that allows us to run our own code with root privileges when run-parts runs.
By creating a malicious run-parts-invoked binary (for example a script named the same as a utility the MOTD script calls) inside /usr/local/bin, we can have that malicious program executed by root whenever run-parts runs during a new SSH login.

Our payload creates a setuid shell binary (or otherwise produces a persistent root shell). After placing the payload, we open a new SSH session. When /etc/update-motd.d is executed via run-parts during login, our malicious binary runs with root privileges and sets the SUID bit on a shell copy or directly spawns a privileged shell.
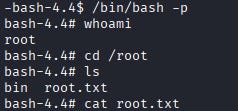
From a new terminal we then run the shell with the -p flag to preserve privileges and we obtain a root shell. From there we can read the root flag (/root/root.txt).